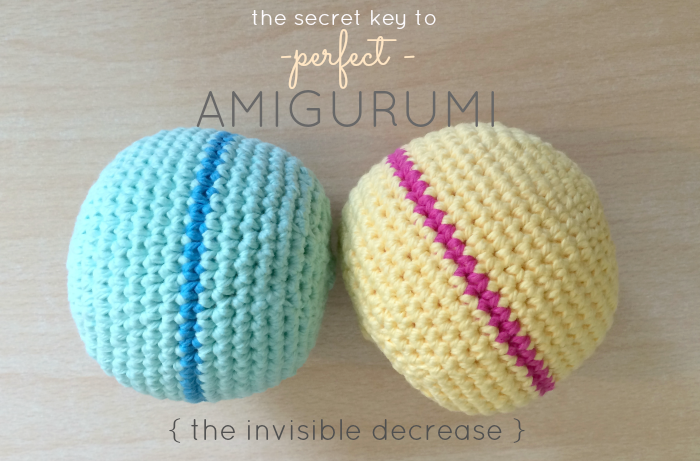
I’ve created this post as an amigurumi for beginners resource. So if you’re just learning the basics, this is the right place! Plus, there’s a free amigurumi ball pattern at the end so you can practice your skills right away.
What Is Amigurumi?
Amigurumi is the Japanese art of crocheting small stuffed toys, characters, and objects. These projects are typically worked in the round using single crochet stitches and are shaped by increasing and decreasing the stitch count. Popular examples include crochet animals, dolls, food items, and cartoon-inspired characters.
Amigurumi is beginner-friendly, uses simple stitches, and the projects are quick to finish. They also make excellent gifts and conversation pieces.
Key Features of Amigurumi:
- Made with single crochet stitches
- Worked in the round (spiral)
- Includes increases and decreases for shaping
- Typically uses a small hook for tight stitches
- Pieces are stuffed and sewn together
Amigurumi For Beginners: 4 Essential Tips
These techniques will help improve the look and feel of your projects from the very beginning.
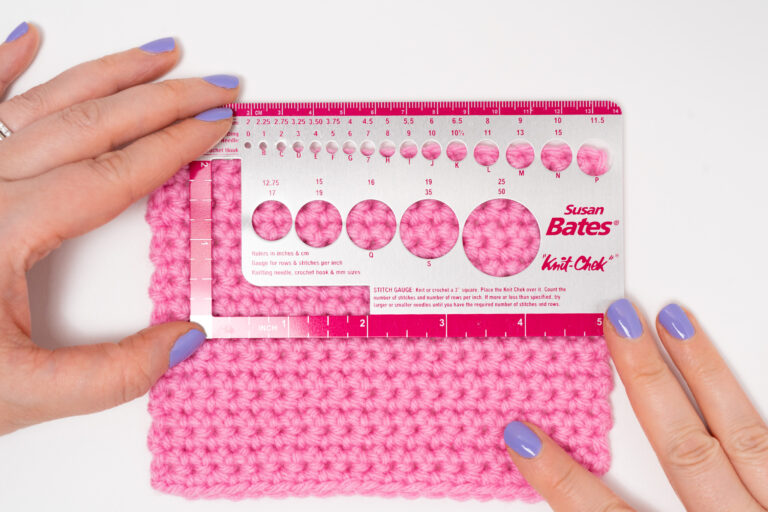
1. Use a Smaller Crochet Hook
Using a small hook (like 3.5 mm) with worsted weight yarn results in tighter stitches. This helps eliminate visible holes between stitches and prevents stuffing from peeking through. Many beginners use hooks that are too large, which can make finished toys look loose or floppy.
Recommended pairing:
- Yarn: Worsted weight acrylic (like Red Heart)
- Hook: 3.5 mm (E hook)
2. Practice the Invisible Decrease
The invisible decrease creates a smoother finish than a standard decrease. Most amigurumi patterns simply say “dec” without specifying the method, but switching to invisible decrease will noticeably improve your work.
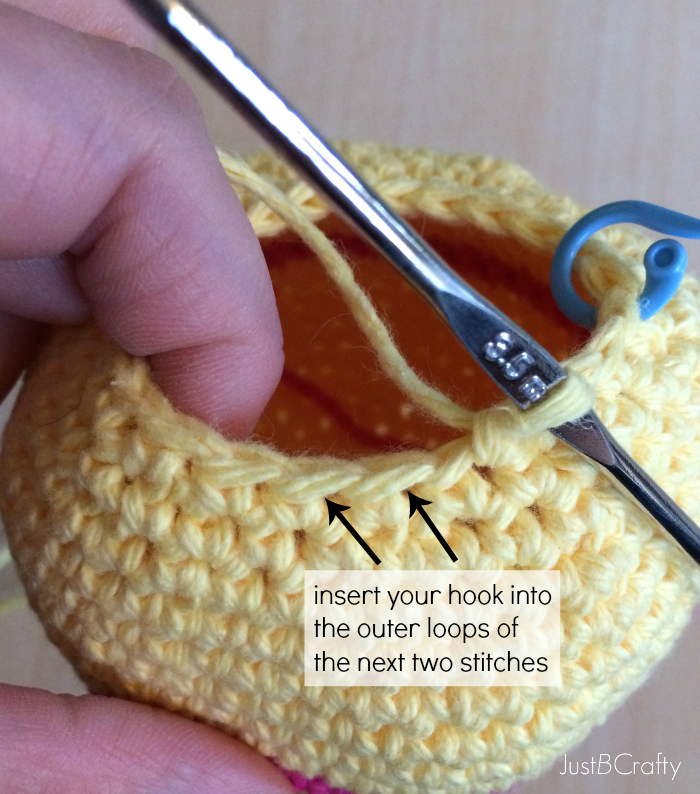
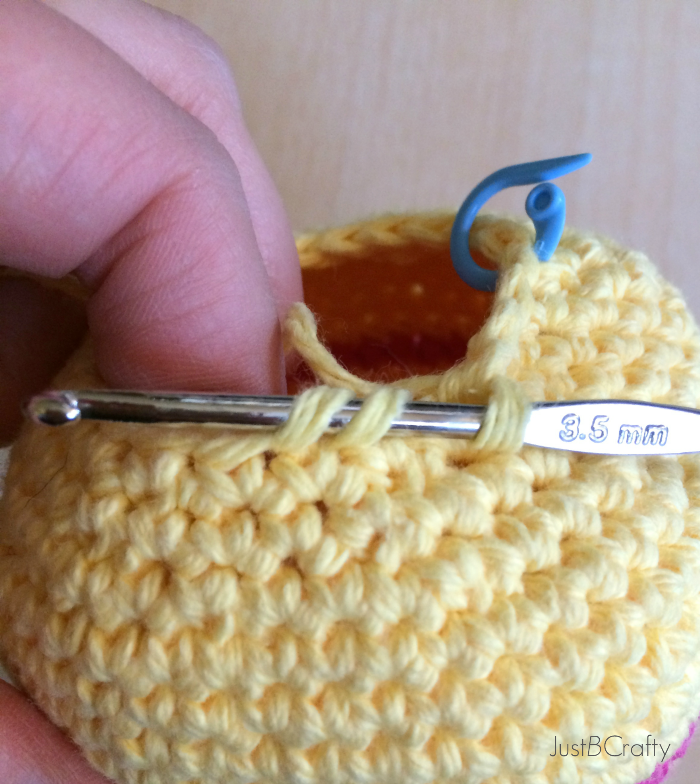
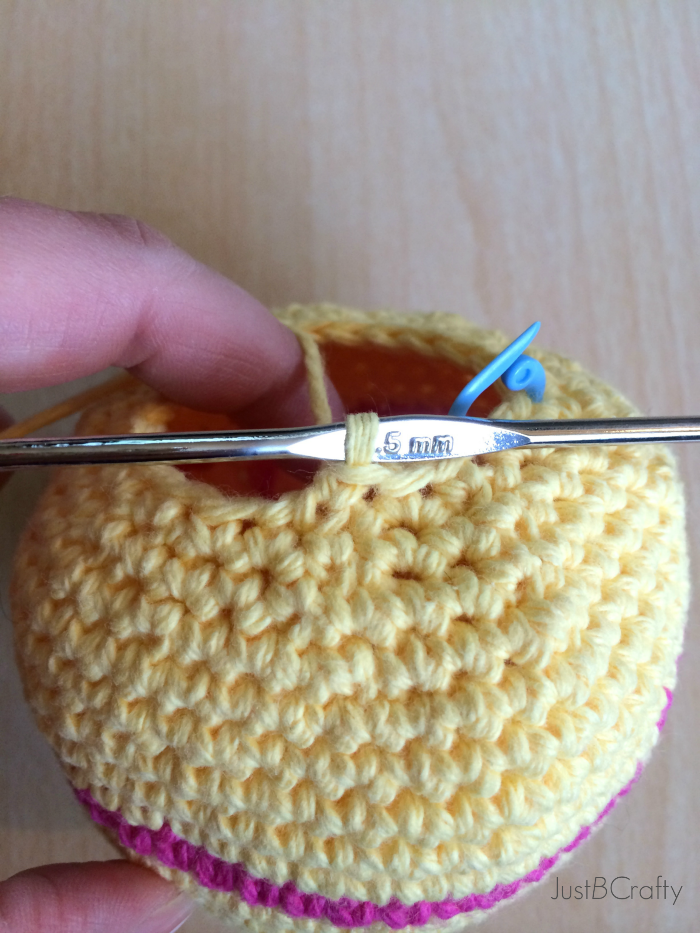
How to Make an Invisible Decrease:
- Insert your hook into the front loop only of the next two stitches.
- Yarn over and pull through both loops (2 loops on hook).
- Yarn over and pull through both loops to complete the stitch.
This technique prevents bulkiness and keeps shaping nearly seamless.


3. Take Your Time with Assembly
Attaching limbs, ears, and other parts evenly can make or break your finished project. Before stitching anything down:
- Plan placement ahead of time
- Use stitch markers to outline where each piece will go
- Whip stitch tightly and secure all ends cleanly
For more on attaching limbs, check out this guide to sewing amigurumi limbs.
4. Just Keep Practicing
Amigurumi is skill-based—and like any craft, your work improves with repetition. Start with small, simple shapes and build up to more complex designs. One of the best beginner practice pieces? A basic amigurumi ball.
Free Beginner Amigurumi Ball Pattern
Master this ball, and you’ll have the foundation for most amigurumi designs. Use it to practice working in the round, increasing, decreasing, and perfecting your tension.
Materials:
- Worsted weight yarn
- 3.5 mm crochet hook
- Yarn needle
- Fiberfill stuffing
Stitch Key:
- sc = single crochet
- inc = increase (2 sc in one stitch)
- dec = decrease (1 sc over 2 stitches)
Pattern:
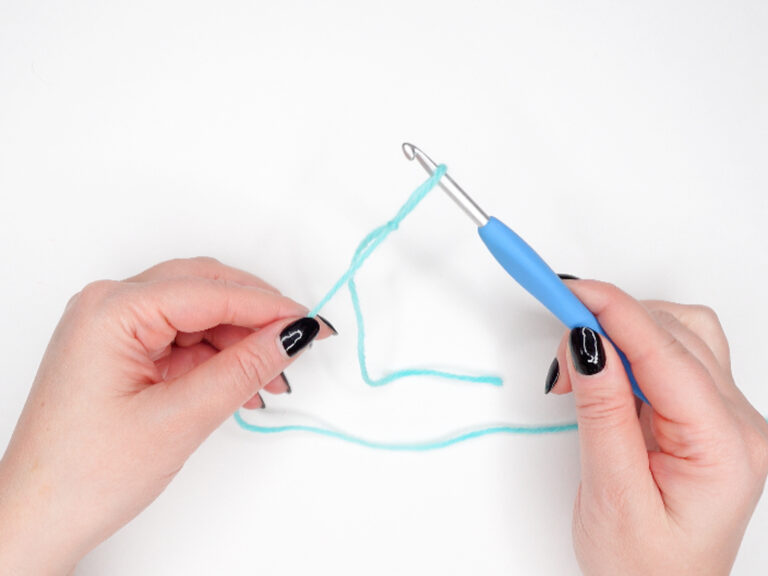
Start with a magic ring.
Round 1: 8 sc in ring (8)
Round 2: inc in each st (16)
Round 3: sc, inc repeat around (24)
Round 4: 2 sc, inc repeat around (32)
Round 5: 3 sc, inc repeat around (40)
Round 6: 4 sc, inc repeat around (50)
Rounds 7–11: sc around (50 per round)
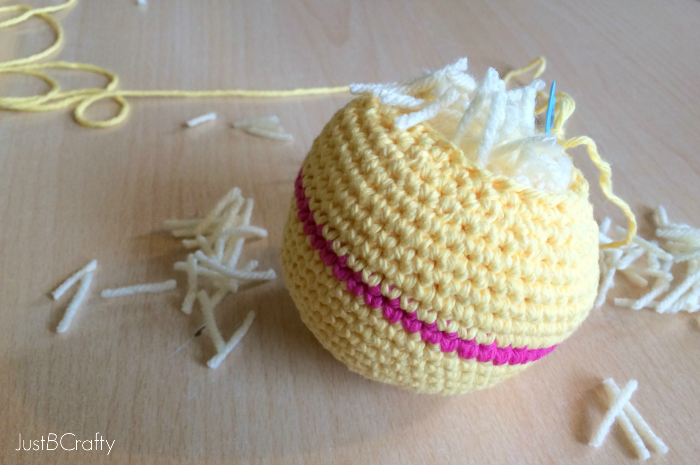
Optional stripe (contrasting color):
Round 12: sc around (50)
Return to main color:
Rounds 13–17: sc around (50)
Now start decreasing:
Round 18: 4 sc, dec repeat around (40)
Round 19: 3 sc, dec repeat around (32)
Round 20: 2 sc, dec repeat around (24)
Start stuffing with fiberfill.
Round 21: 1 sc, dec repeat around (18)
Round 22: dec in every st (12)
Round 23: dec in every st (8)
Fasten off and weave in the end.


Amigurumi is fun, rewarding, and beginner-friendly once you learn the fundamentals. Using a smaller hook, mastering the invisible decrease, and taking care with assembly will dramatically improve your results—even on your first few projects.
Looking for more amigurumi patterns and tutorials? Join the Just Be Crafty email list or follow along on YouTube for step-by-step videos and cozy crochet inspiration.

Gorgeous! So perfect! Great info too 🙂 The whole crochet world is new to me, but I really want to learn!
Once again your work is great, plus I'm always a fan of your beautiful pictures!
I'm clueless when it comes to crocheting, but your projects inspire me to learn … absolutely adorable!!
I am obsessed with the star wars croheted guys! Ok ok but I love these balls too, great pattern!!
That Legend of Zelda crocheted character is too cute! My kids would love that!
Im featuring this post tomorrow at Link it or Lump it! THanks for linking up Brittany!
Thanks Sonnet!! 🙂
Just finding this post on Pinterest. Love it. I took up crocheting so I could make amigurumi creatures but have never tried them. I will have to try them now. Your explanations make it sound so doable. Thanks so much
Good I’m glad! I hope you give amigurumi a try…it’s so much fun!!
A mi parece sensacional
No sé que tanto pueda hacer pero, lo que sí te digo es que me motiva mucho para emprender el proyecto, ya luego te cuento como me ha quedado. Gracias.
A mi parece sensacional
No sé que tanto pueda hacer pero, lo que sí te digo es que me motiva mucho para emprender el proyecto, ya luego te cuento como me ha quedado. Gracias.
What a relief to find out I'm not the only who spends so much time unraveling projects which did not turn out as I had pictured them in my mind.
This is so useful, i have been decreasing in a different manner, but will give this a try. Thanks for the tip.
thank you for sharing this information! I couldn't figure out why when I did an decrease I would get these holes that showed my stuffing when I was done! I've got to try this out and see if that's what was causing my problem.
What size is this ball?
How big is the ball in this pattern? I am trying to make a smaller version of a basketball. Probably a little bigger than the size of a hand. How would the increase go?
Thank you. Thank you for sharing the pattern and information.
Anna
Hi Anna! This ball is approximately the size of an orange, you would keep increasing in the same fashion as the pattern lists until you reach the circle width desired, then complete a few rounds of sc without any increases, and then begin decreasing.
Thank you! Invisible decrease is awesome 🙂 Am going to try it out with some other stitches too and see what happens. (esp. popcorn!)
That’s the way I approach things that are new to me – like I’m just playing around to see what happens. Stops me from getting too discouraged. (Sometimes I call myself scribblewoman to keep myself in the ‘playful zone’ hehe).
Hahaha, yes! I agree, thats the way to be when learning something new, best not to take it seriously or else frustration can set in! 🙂
Just finished this pattern, and the decrease was new to me. I should have started on these so long ago! I much prefer this decrease, and this was fun to make. 🙂 I used shredded plastic bags (like Walmart bags) to give the balls a “scrunchy” feel and sound to them, and so that my baby’s drool wouldn’t make the filling gross. Thanks for the great lesson, and cute pattern!! I plan on making more of these soon to add to Christmas presents for all the younglings in my life this year. Yay!!
Great tutorial! But I have one question. I’m to the point where I want to start making my own patterns but I’m sometimes having a difficult time understanding why patterns are written the way that they are. For instance with the ball, why do you start increasing in every 3rd or 4th stitch and not just every other stitch throughout the whole piece. I would really like to be able to understand why it’s done in that specific way so I can begin to use those shaping techniques to my advantage. I need to be able to deconstruct the pattern in order to learn how to write my own, lol.
Hi Leanna! Good question! Sometimes the best way to learn is just trial and error… but in this case, if you were to increase in every other stitch for the whole piece the ball wouldn’t end up as a ball shape, it would end up getting too large too quickly. When I first started learning I followed a lot of patterns with many different shapes. Once you are used to making some basic shapes you will find a lot of similarities and get a feel for how to construct a pattern on your own. I kind of look at it like it’s a sculpture, only with yarn. I hope that helps!? 🙂
Yes! Thank you so much!
Another way I do it is to go by multiples. When I first learned to make amigurumi I did everything in multiples of 6. Play around with that (multiples of different numbers) and you will see different results.
I like the way Brittany does it as well. Instead of multiples they go up by adding a certain number. For instance, for the ball it goes up by adding each of the following numbers to each row spread out evenly (4, 6, 6, 8, 8, 10). It’s like math sculpture.
Thanks so much! At first I was doing it wrong, essentially making a double crochet dec, then I reread because it didn’t look right. Once you do it right it’s so magical. Hah.
Good!! I am glad you found the tutorial helpful! 🙂
Beginner crochet learner but amiguri is my main motivator. Thanks for the clear instructions! Question though: do you “turn” after each round or just keep going? Thanks
Thanks for showing the decrease stitching, it was a great help 🙂
So, question. I was following the pattern to the T until the 5th round. I didn’t get 40 stitches (I got 36), and the 5th row I got 42 instead. I followed your pattern still with when I was increasing. Did I do something wrong? I just want to make sure. Thanks for the blog! Im glad you showed the invisible decrease ^_^
Hi Katie! Thanks for your comment!
Mathematically row 5 should always come out to 40 stitches. Your row 4 should be ending with 32 stitches.
On row 5 you will be increasing in every 4th stitch, so if you take 32 stitches and divide by 4 that comes to be 8 stitches. This means you are adding 8 stitches in that round. Adding 32 plus 8 stitches will give you 40 stitches by the end of row 5.
My suggestion is to count stitches after each row. It can be kind of annoying, but will save you a lot of time in the long run. 🙂 Trust me, I have learned that the hard way! 🙂
If you have any other questions please reach out!!
Please explain what is a magical ring ?
Please explain what is a magic ring ?
Hi Mary Ann!
Below is my video tutorial on the magic ring/magic loop.
https://www.youtube.com/watch?v=_yNj1ZGy0PA
I have seen and used the magic ring before, but only to create the ring itself, not the first round of stitches, which, in this case, was sc. then I could do what I needed, into the ring.
I found this magic ring really tricky, and wonder if it’s because it’s a magic ring and 8 sc, not just a magic ring. I’m a beginner, so rhat confused me a little, as well as the thread only being wrapped around the index finger. I had trouble seeing which yarn was doing what.
Hi there! I have a video tutorial on the magic ring if you’d like to check it out – it might help to see a visual :). https://youtu.be/_yNj1ZGy0PA
That’s the same link as the one I used, that I found hard to follow. I have figured out how to do it though, and then do the 8 dc into the ring as a separate ‘step’, so the ring is clear. I think the index finger is the issue, in the other one I watched, the yarn is thread around a couple of fingers, so it’s really clear (to me!).
I’ve been crocheting since I was about four or five years old-I’m 55 now. I never knew how to do an invisible decrease! Thank you so much-I’m off to give it a try. Wonderful post. Mary
Hi i have been crocheting for so many years had to learn on my own being a lefty can be quite a challenge sometimes …have never tried my hand at this but u make it look so easy
Hi Hema! Thank you for stopping by! Let me know if you try it out! 🙂
Aha! THANK YOU SO MUCH! I could not figure out why my decreasing half always seemed so chunky and weird and my increasing side looked so perfect! Your explanation of an invisible decrease was fabulous! Off to make pokeballs and maybe move on to a creature of some sort!!!
Yay! I am so happy you found this helpful! Have fun crocheting your Pokeballs!
I am making Xmas ball and was really discourage with my decrease. Can’t wait to try this.?Thank You for your post!!
I hope you do! I think you will really like the results! Let me know how it goes :).
The first time I’ve managed to make a sphere that ends up looking like a sphere. Loved this pattern. If I knew how to attach a photo I’d show you what I ended up with.
Yay! I’m so happy it turned out! Are you on instagram? If so feel free to share your photo on there and tag me in it and use the hashtag #justbecrafty – I’d love to see it! 🙂
I’m not on insta sorry. I do wonder though, where your colour join comes in, how does it look on the finished ball? I find mine has a ‘stepped’ look, so wonder if that’s normal or not.
I’ve shared a few pics on my dog’s FB page though, and so far have shared your pattern with those who’ve asked, it is popular!
I’ve put a link below to Barney’s page, where you can see one in progress (poor dog!) and one finished: https://www.facebook.com/BarneyRubbletheDog/
May I see the other side of the ball where the colour change is made? Thanks.
Donna
I would like to see that, too. The pattern doesn’t call for joining, so the one row of contrasting color might not meet if it’s done as a spiral.
Hi, I’ve tried the round 1-6 about 5 times and every time is creates a round disc, not a domed shape. I think that the pattern is not correct unless I’m doing something not right.
Hi there! Yes, it will be a round disc until you start on your decreases. Once you start decreasing, the ball shape will form. Keep going, you’re on the right track!
Any chance you could teach us how to make your color join so smoothly? Mine always looks like steps!!! Thanks for your tutorial ?
You are so sweet for sharing some best ideas regarding perfect round.. I use it to make for head of my bear. God bless. Thank you so much